2.2.1 Insert tables in the document and customise properties
To insert tables,
-
position the cursor where you want the table to appear
-
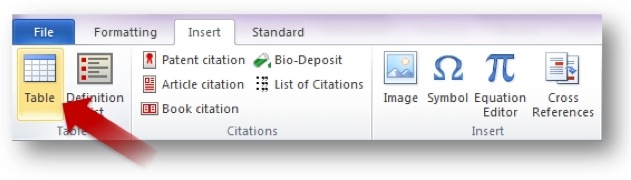
select the Insert tab and click on the Table icon
-
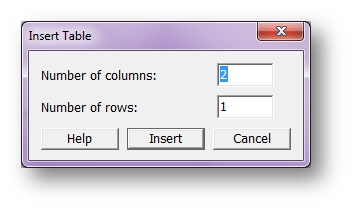
enter the desired number of rows and columns (max. 63 each)
Note: Tables cannot be inserted in the Title, Abstract (Problem and Solution) or Drawings sections or within the document headers.
2.2.2 Customise table properties and format table content
After you insert a table, you may:
-
customise the table properties/table titles; double-click on the table title
-
add or remove columns/rows; use the PatXML Table toolbar
-
format table content; use the PatXML Formatting toolbar
Video: 2.2.2. Customise table properties and format table content
Note: The MS Word® Draw Table tool is disabled.